

25 Drawing on Hand Ideas With Pen for Beginners and Creative Doodlers
Key Takeaways
You can turn a few minutes of idle time into playful hand art with an ordinary washable pen and a little patience.
- Choose skin-safe, washable tools and test them before drawing.
- Begin with small symbols, basic flowers, leaves, animals, or faces.
- Let the shape of your fingers, knuckles, and palm guide the design.
- Use line weight, hatching, dots, and limited color to add depth.
- Photograph the finished piece before washing it away or changing it.
1. Prepare your hand and pen for drawing
Good hand art starts with sensible preparation rather than an elaborate supply list. You need a pen that feels controlled, a clean surface, and a position that does not leave your wrist twisted. Since skin is not paper, plan for movement, warmth, and natural creases from the beginning. A few minutes of preparation can make your drawing on hand ideas with pen look much cleaner.
Choose skin-safe, washable drawing tools
Use pens clearly labeled for skin or cosmetic use, and favor washable formulas for temporary doodles. Avoid permanent markers, industrial inks, and anything that does not identify its intended use. Keep a tissue and mild soap nearby so you can remove stray marks without scrubbing aggressively. A fine tip is useful for tiny symbols, while a slightly broader tip can make simple shapes easier to see.
Clean and dry your hand before sketching
Wash your hand with mild soap, rinse well, and dry it completely before you begin. Oil, lotion, or moisture can make ink bead, skip, or fade quickly. Rest your hand on a clean towel while you work so the surface stays comfortable and your fingers do not slide around. Clean skin also gives your first light guidelines a more predictable line.
Test ink on a small area first
Try a small mark on an inconspicuous patch and wait a little while before covering your hand. Stop if you notice burning, itching, redness, or other irritation, and remove the ink gently. A test also tells you how dark the pen appears and how easily it washes away. This tiny step is worth taking whenever you use a new product.
Position your hand for comfort and control
Place your drawing hand on a table with your wrist relaxed and your non-drawing hand close by to steady a finger. Work in short strokes instead of stretching across the whole hand in one motion. If you are drawing on the back of your hand, rotate the hand rather than bending the pen awkwardly. Comfort improves control and helps you keep delicate details from wobbling.
2. Start with simple drawing on hand ideas
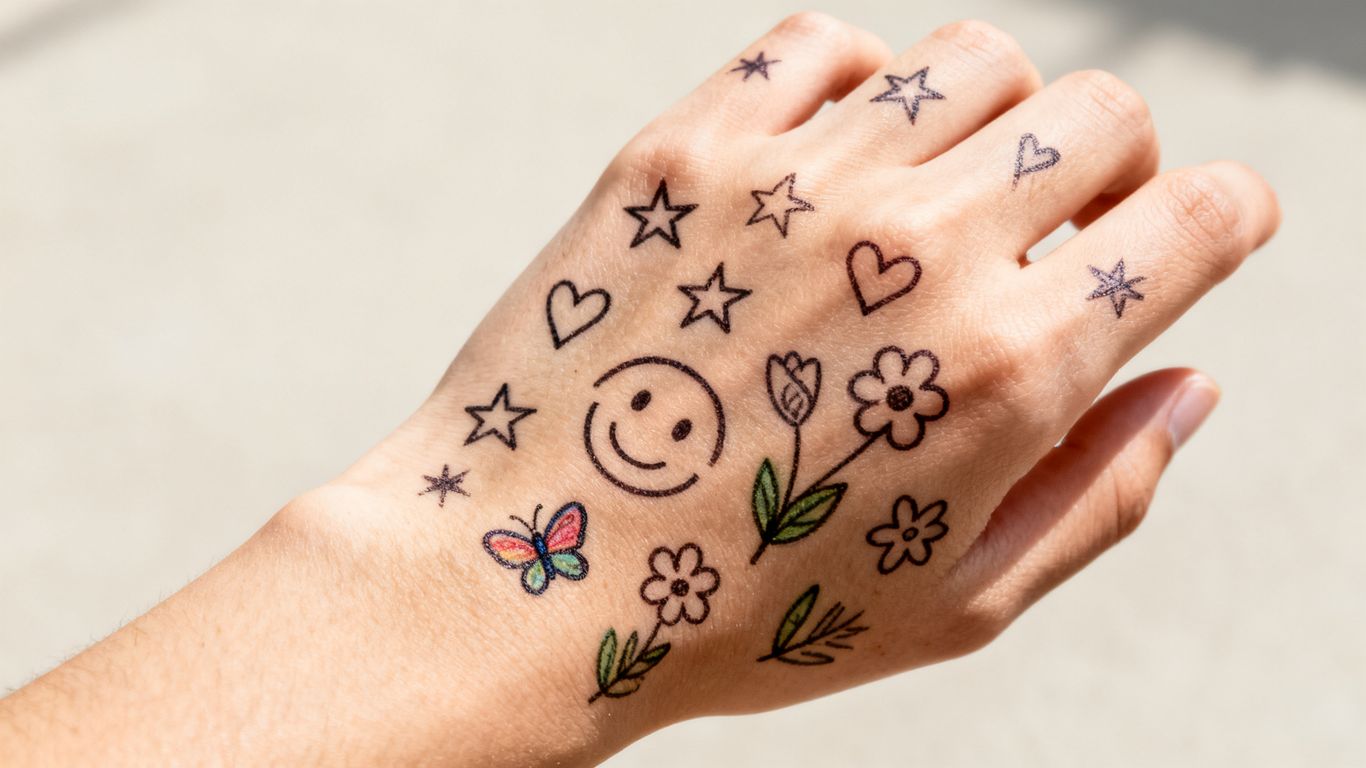
The best beginner designs are small enough to finish before your hand gets tired. Start with familiar shapes, then repeat or combine them to create something that feels more personal. If you want extra visual prompts, browse these easy hand doodles before choosing a motif. Keep your first attempt loose; a little asymmetry often gives hand drawings their charm.
Try stars, hearts, and tiny symbols
Draw a five-point star, a rounded heart, a crescent, a lightning bolt, or a tiny sparkle near a knuckle. You can vary the scale so one symbol acts as the focal point and two smaller marks act as accents. A row of dots or miniature crosses can connect them without making the design feel crowded. These are quick wins when you want something expressive but low-pressure.
Build flowers from basic shapes
Begin with a small circle and surround it with five or six simple petals. Try tulips made from curved triangles, daisies with dots, or a flower whose petals follow the curve of a finger. Add one short stem only after the blossom looks balanced. Repeating the same flower in different sizes creates a tiny garden without demanding advanced drawing skills.
Draw leaves, vines, and botanical patterns
A curved line can become a vine, and paired almond shapes can become leaves. Follow the length of a finger for a climbing stem, or let a vine curl around the edge of the hand. Keep the leaf veins minimal so the design remains readable at a small scale. For more inspiration from pen practice, explore these pen and ink ideas and adapt their textures to your skin.
Add small animals and insects
A bee can be made from an oval, two wings, and a few stripes, while a butterfly needs little more than mirrored loops. Try a sleepy cat face, a tiny frog, a ladybug, or a snail with a spiral shell. Simplify the features to two eyes and one expressive mouth. The goal is recognition, not anatomical precision.
Create playful smiley faces and characters
Use circles, dots, and curved mouths to make a collection of tiny moods. One face can look surprised, another sleepy, and a third mildly offended by the concept of homework. Give a character a small hat, ears, antennae, or a cape for an extra personality cue. Keeping each face compact lets you build a little cast across several fingers.
3. Use your hand shape to guide the design
Your hand is not a flat sheet, and that is exactly why it can produce more interesting doodles than a notebook margin. Fingers provide narrow paths, knuckles create natural landmarks, and the palm offers a broader center. Before drawing, close and open your hand once to see where the skin shifts. Treat those movements as part of the composition instead of fighting them.
Turn fingers into stems, claws, or branches
A long finger can become a flower stem, tree branch, tentacle, or dragon claw. Sketch the main line down the center, then add small details that follow its direction. You can draw a leaf on one side of the finger and a bud on the other for a simple botanical illusion. Keep the fingertip relatively open if you want the design to remain readable while you move.
Draw around the knuckles and finger joints
Knuckles work well as centers for flowers, eyes, stars, or tiny geometric bursts. Place the main shape beside the joint rather than directly across a deep fold if you want it to last longer. A row of dots can travel over the joints and create a bracelet-like rhythm. Use a relaxed hand while drawing so the placement reflects its everyday shape.
Create patterns across the back of your hand
The back of the hand gives you enough room for a central motif with smaller details around it. Try a sun surrounded by dots, a moth with decorative wings, or a loose constellation. Build outward from the middle and pause often to check the balance from a normal viewing distance. A pattern can feel deliberate even when every individual mark is simple.
Use the palm as a central canvas
The palm is expressive but busy, so choose designs that can tolerate movement. A spiral, eye, smiling planet, or simple mandala can sit in the center while short rays or dots fill the surrounding space. Avoid packing every crease with ink; leaving some skin visible keeps the image legible. Palm drawings are especially fun for quick photos because the design changes when you open and close your hand.
Adapt designs for left- and right-handed drawing
If you draw on your dominant hand, work in sections and rotate your wrist often rather than reaching across wet ink. For the other hand, use it as a stable surface and move the drawing hand in smaller arcs. You can also mirror a simple design instead of forcing perfect symmetry. A slightly different left and right version can look intentional, like two related characters rather than duplicates.
4. Explore pen styles and shading techniques
Once you are comfortable with basic motifs, line treatment can make the same idea feel delicate, bold, soft, or comic. Keep your pressure light at first because skin can make a stroke appear darker than expected. Test each technique in a small corner before adding it to the main drawing. The finished effect should support the shape, not bury it under decoration.
Make clean outlines with controlled strokes
Use short, steady strokes instead of dragging one long line across a moving surface. Rest the side of your hand lightly, but avoid smearing areas you have already finished. For circles and curved petals, turn the hand as you draw so the wrist stays relaxed. If a line goes wrong, incorporate it into a leaf vein, sparkle, or second outline rather than repeatedly tracing it.
Add depth with cross-hatching
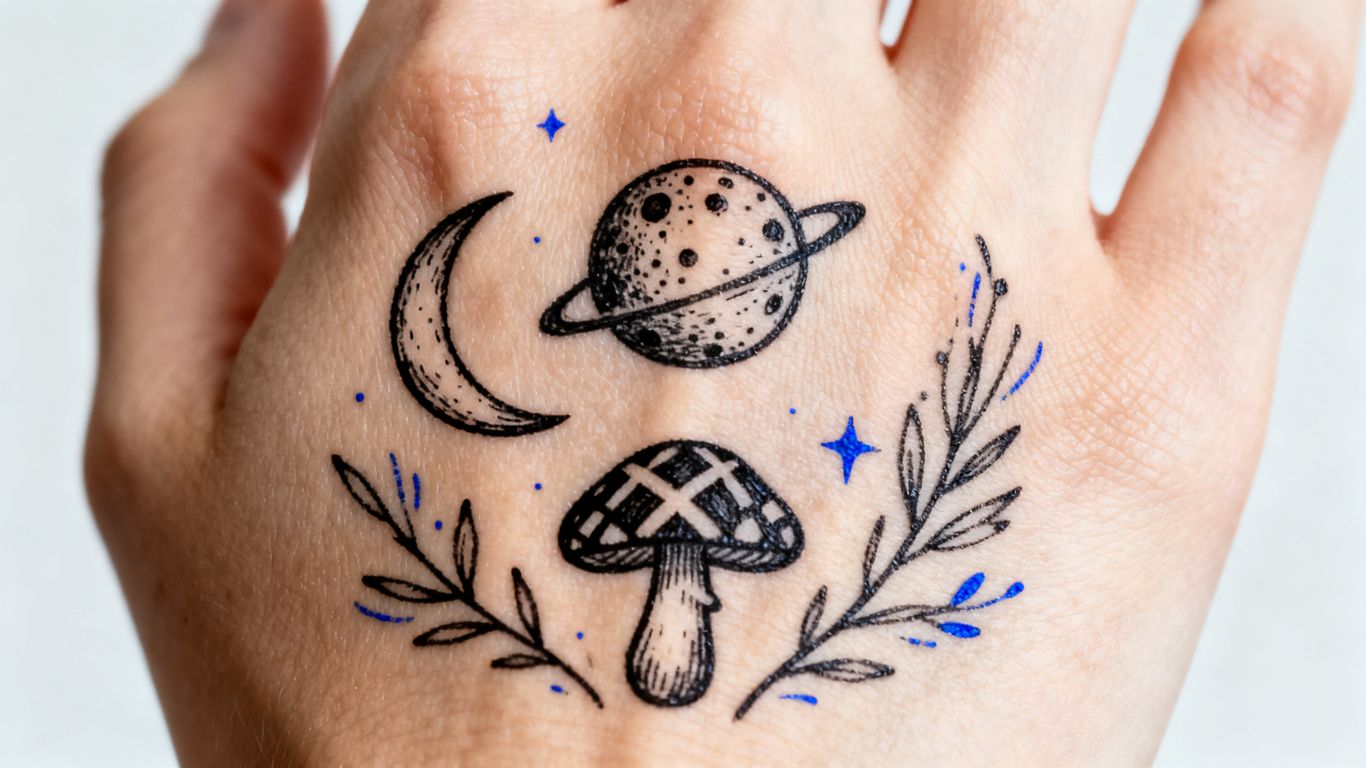
Cross-hatching uses sets of angled lines that overlap to create darker areas. Add one direction of lines first, then a second direction only where you want more shadow. It works nicely under a moon, inside a character’s hair, or along one side of a mushroom cap. Keep the spacing wide on skin so the texture does not become a solid block.
Create texture using dots and stippling
Dots are forgiving and easy to scale. Place them close together for shadow, then gradually spread them apart as the area becomes lighter. Use stippling around stars, inside a planet, or along the edge of a leaf. Because dots do not rely on long continuous strokes, they can also work well near small creases.
Combine thick and thin lines
Use a fine line for interior details and a stronger line for the outside edge of the main shape. This contrast helps a tiny animal, flower, or planet stand out without adding more color. The following guide can help you choose a visual direction when you want your doodle to feel more like a finished graphic than a random mark. In that spirit, Drawing on Hand designs from TrendReactTees.STORE draw on spontaneous doodle energy and imperfect personal lines.
| Technique | Best for | Visual effect | Beginner tip |
|---|---|---|---|
| Fine outline | Symbols and faces | Light, delicate edges | Use short strokes |
| Bold outline | Main motifs | Stronger silhouette | Apply less pressure than you expect |
| Cross-hatching | Shadows and folds | Layered depth | Leave space between lines |
| Stippling | Texture and gradients | Soft, speckled shading | Spread dots toward highlights |
The table is a useful starting point, not a rulebook. Try one technique at a time on a small motif, then combine only the marks that remain clear when your hand is held at arm’s length.
Use limited color for emphasis
One accent color can make a black-ink design feel finished without turning it into a crowded illustration. Add a blue planet, red heart, yellow star, or green leaf after the outline has dried. Keep the palette to one or two colors so the focal point remains obvious. TrendReactTees.STORE also works in high-contrast graphic apparel and niche visual themes, so a restrained palette can help your temporary hand art feel closer to a wearable graphic.
5. Create themed hand doodles
A theme gives separate little drawings a shared mood. You might choose a night sky, a forest floor, a tiny cartoon cast, or a clean geometric language. The theme does not need to be complicated; repeating two or three visual ingredients is usually enough. For a cyber, anime, pixel-art, or internet-culture mood, TrendReactTees.STORE offers graphic T-shirts built around those broader visual themes, which can be useful inspiration without requiring you to copy a specific design.
Design celestial moons, stars, and planets
Draw a crescent moon near the thumb and scatter stars toward the fingers. Add a ringed planet, a tiny comet, or a dark circle with dotted craters to vary the shapes. Use a few dots as distant stars rather than filling every open area. A curved trail can guide the viewer from one side of the hand to the other.
Draw nature-inspired leaves and mushrooms
Combine small leaves with mushrooms, acorns, berries, or a winding stem. Give each mushroom a different cap shape, then add sparse dots or short vertical marks for texture. A fern-like arrangement works especially well along the side of the hand because the stems can follow its natural angle. Keep the details simple enough that the theme survives ordinary hand movement.
Make cute animals and cartoon creatures
Choose one animal and exaggerate its most recognizable feature: rabbit ears, a cat’s whiskers, a frog’s round eyes, or a bear’s small ears. Add a tiny prop such as a mug, flower, backpack, or crown. You can distribute a group across several fingers, but keep their faces facing the same direction for visual unity. Simple expressions often make these creatures more charming than elaborate anatomy.
Try minimalist geometric patterns
Use triangles, half-circles, dots, parallel lines, or interlocking squares to create a clean pattern. Repeat one shape at different sizes across the back of the hand, or make a narrow border along a finger. Measure visually rather than chasing perfect mathematical symmetry. Small imperfections can make the design feel handmade rather than mechanically printed.
Build a temporary tattoo-style composition
Start with one central image, then add two or three supporting motifs and a few connecting marks. Keep the outline crisp and leave open skin around the main elements. A moth with stars, a snake with leaves, or a moon surrounded by tiny symbols can all work as temporary tattoo-style compositions. Think in terms of a small poster: focal point first, accents second, empty space throughout.
6. Improve accuracy and make designs last longer
Accuracy comes more from planning than from drawing faster. Before adding details, consider how your hand will bend, what parts will rub against clothing, and which areas you want to remain visible. Temporary art naturally fades, but careful placement can help it stay attractive for longer. A calm, layered process also makes corrections much easier.
Sketch the layout with a light guide
Use a very light washable mark to place the center, direction, and approximate size of your design. A quick oval can show where a planet belongs, while a faint curve can establish a vine or constellation path. Check the layout with your hand both relaxed and open before darkening anything. This prevents a beautiful focal point from ending up awkwardly close to the edge.
Work from large shapes to fine details
Block in the main circle, leaf, face, or silhouette before adding texture. Once the large shapes sit well, refine the outline and then add small dots, stripes, or highlights. This order keeps you from spending time on details that later need to move. It also makes beginner designs feel more deliberate.
Avoid drawing over moving creases
Deep creases bend, rub, and collect moisture, so ink there may break up quickly. Place important facial features, lettering-like marks, or delicate lines beside those folds instead. If a crease is part of the design, use it for a gap or boundary rather than trying to cover it completely. Your drawing will look more natural as the hand moves.
Let ink dry before adding layers
Give each area a short pause before placing another line or color over it. This is especially helpful with darker outlines, cross-hatching, and accent colors. Use that waiting time to view the design from another angle instead of touching the wet section. A simple sequence keeps the surface cleaner and reduces accidental smudges.
Remove the design safely when finished
Wash with mild soap and warm water, then use gentle circular motions rather than aggressive scrubbing. If a washable mark lingers, repeat the process later instead of irritating the skin. Stop if the area feels sore or looks irritated. Removing the drawing carefully leaves you ready for the next round of ideas.
For a repeatable cleanup routine, keep these steps nearby while you work:
- Wash with mild soap and comfortably warm water.
- Pat the skin dry instead of rubbing it hard.
- Repeat gently if a faint mark remains.
- Stop immediately if irritation appears.
This approach treats removal as part of the project rather than an annoying final chore. It also gives you a clean starting point for your next doodle.
7. Turn individual doodles into complete hand art
A finished hand drawing feels cohesive when the eye can travel through it without hitting a wall of unrelated marks. You do not need to fill every inch; a few well-placed elements usually look stronger than a crowded collection. Step back often and look at the whole hand, not just the tiny section beneath your pen. The goal is a design that works both up close and in a quick photograph.
Balance the design across the fingers
Distribute visual weight instead of placing every dark or detailed element on one finger. If one finger carries a large flower, use smaller leaves or dots nearby to keep the composition connected. Varying size creates rhythm, while repeating a color or line style creates unity. Turn your hand palm-up and palm-down to check whether the balance still feels intentional.
Connect separate elements with lines or vines
A thin vine, dotted path, constellation trail, or series of tiny arrows can connect motifs without adding much ink. Let the connector follow the natural direction of the hand. Avoid crossing through important faces or the strongest part of a flower. A restrained connection can make separate doodles feel like one small illustrated world.
Leave negative space for a cleaner look
Empty skin gives the eye somewhere to rest and helps each motif remain recognizable. If a design feels cluttered, remove a few dots before adding anything else. Negative space is especially useful around bold outlines and dark hatching. The clean gaps can make a simple drawing look more considered.
Match the design to an occasion or outfit
Choose soft florals for a relaxed day, celestial marks for an evening look, or graphic geometric shapes when your clothes already have a strong silhouette. You can coordinate one accent color with a shirt, bag, or nail color without matching everything exactly. TrendReactTees.STORE focuses on identity-driven graphic apparel, so the same principle applies here: let the design express a mood rather than chase perfection.
Photograph the finished drawing from useful angles
Use bright, indirect light and hold your hand in a relaxed pose first. Take one overhead image, one angled view, and one photo with the fingers slightly spread so the placement is easy to understand. Keep the background quiet and wipe away any stray marks before shooting. A quick record lets you compare ideas and remember combinations that you want to draw again.
Conclusion
With a washable pen, a steady position, and a willingness to let simple shapes do the work, you can make hand art that feels personal without needing advanced skills. Start small, use your hand’s structure as part of the design, and build toward a connected composition one mark at a time.
Frequently Asked Questions
What is the easiest thing to draw on your hand?
Stars, hearts, smiley faces, leaves, and tiny flowers are excellent starting points because they use simple shapes and can be finished quickly.
Which pen is safest for temporary hand drawings?
Choose a washable pen clearly labeled for skin or cosmetic use. Avoid permanent markers and products that do not specify their intended use.
How can you make a hand drawing look more detailed?
Add controlled line-weight changes, sparse cross-hatching, stippling, or a single accent color. Build details only after the main outline is clear.
Should you draw on the palm or the back of the hand?
The back of the hand is usually easier for broad compositions, while the palm is fun for central symbols that can change shape as you move your hand.
How do you stop hand doodles from smearing?
Let each area dry before adding another layer, keep your wrist from dragging across wet ink, and use short strokes instead of repeatedly tracing lines.
How long do pen drawings on skin last?
Duration depends on the ink, washing, friction, and placement. Designs on areas that bend or rub generally fade sooner than those on less active skin.
How do you remove pen drawings from your hand?
Wash gently with mild soap and warm water, pat the skin dry, and repeat later if needed. Do not scrub hard, especially if the skin becomes irritated.